A broken fishing rod can instantly ruin a fishing trip, especially when it happens unexpectedly. Whether it’s a snapped tip or a clean break in the middle, the frustration is real. But it doesn’t always mean your rod is useless.
The good news is that most rods can be repaired at home with the right tools and techniques. But how to fix a broken fishing rod? You can fix it by replacing the tip or reinforcing the break using epoxy, binding, or internal support methods.
Learning how to fix a broken fishing rod can save you money and extend the life of your gear instead of buying a new one. Here, you’ll learn everything about it.
Can a Broken Fishing Rod Be Repaired?
Yes, in many cases, any damaged rod, like a carbon fiber or fiberglass fishing rod, can be restored with proper techniques and materials. The key is identifying the type and severity of the break before deciding whether repair or replacement is the better option.
When Repair Is Possible
Most fishing rods can be fixed if the damage is minor or clean. Simple repairs restore function and extend usability without significant performance loss.
- Clean break: easy to align and bond.
- Tip damage: quickest and simplest repair.
- Minor cracks/splits: can be reinforced effectively.
When Replacement Is Better
Some damage goes beyond practical repair, especially when strength and performance are compromised. In these cases, replacing the rod is often the smarter choice.
- Multiple fractures: weak structural integrity.
- Severe structural damage: unreliable after repair.
- High-end rods: Repair may reduce sensitivity and performance.
Common Types of Fishing Rod Damage
Fishing rods can break in several ways, depending on usage, accidents, or wear over time. Identifying the exact type of damage is essential before choosing the right repair method and ensuring long-lasting performance after fixing.
Broken Fishing Rod Tip
This is the most common issue anglers face, often caused by accidental impact, snagging, or regular wear. Tip damage is usually easy to fix with a simple replacement and proper adhesive.
Rod Broken in Half (Mid-Section Break)
A mid-section break is more serious and typically results from heavy stress or improper handling. It requires reinforcement methods like internal support, sleeves, or binding, but it is still repairable.
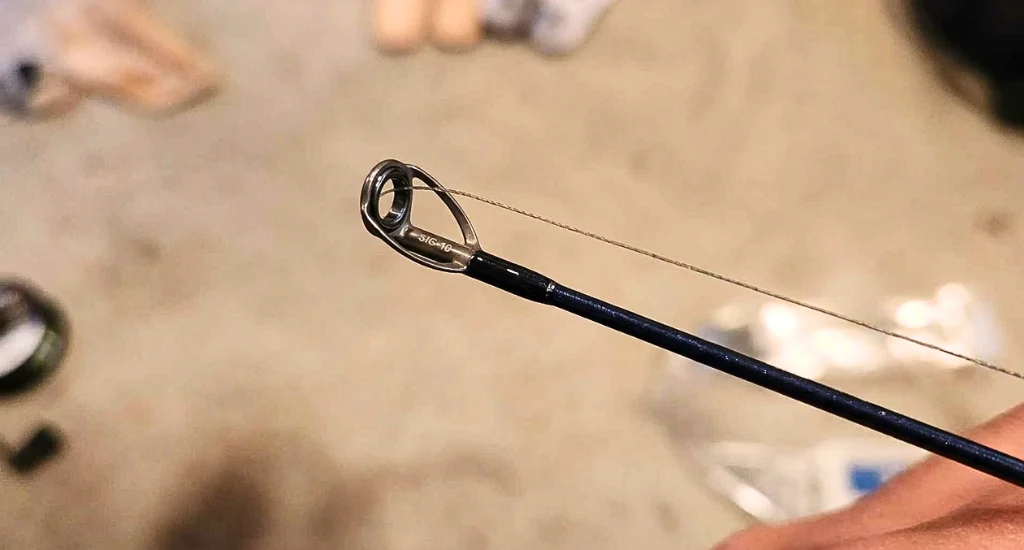
Broken Guide / Eye / Ring
Damaged guides or rings can fray your fishing line and reduce casting efficiency. Fortunately, they are relatively easy to replace by removing the old guide, wrapping a new one, and sealing it.
Damaged Handle or Blank
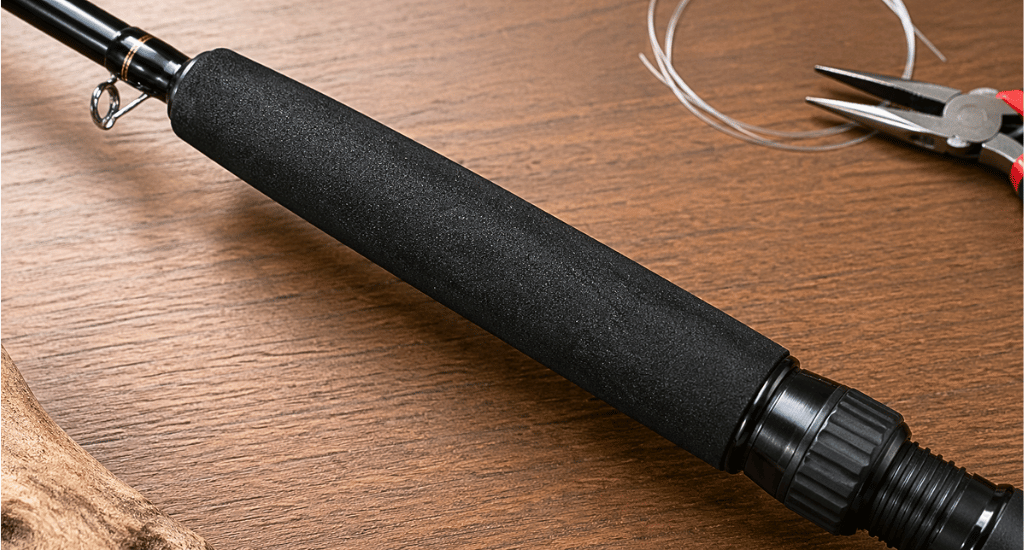
Handle or blank damage affects grip comfort and structural integrity. While minor issues can be repaired, severe damage to the blank may weaken the rod and impact overall performance.
Tools and Materials Needed for Rod Repair
Repairing a fishing rod requires a mix of basic and advanced materials depending on the damage type. Having the right tools ensures stronger fixes, better alignment, and longer-lasting performance after completing the repair process.
- Number 8 wire: Strong binding material used to tightly secure broken rod sections.
- 30 lb braided fishing line: Flexible, durable wrapping line ideal for reinforcing repairs.
- Nail polish: Quick temporary sealant to protect wraps before applying the final epoxy coating.
- Rod resin/epoxy: Essential adhesive that bonds rod parts and hardens for durability.
- Two-part epoxy: High-strength bonding solution that provides long-lasting, professional-grade repair strength.
- Replacement rod tip kit: Includes new tip and glue for fast and easy tip repairs.
- Fine-grit sandpaper: Smooths rough edges and prepares surfaces for proper bonding.
- Rod wrapping thread: It’s the designed thread used for tight, clean, and secure guide or break wraps.
How to Fix a Broken Fishing Rod Tip (Step-by-Step)
Fixing a broken rod tip is one of the easiest and most common repairs. With a few basic tools and proper steps, you can quickly restore functionality and get your fishing rod back in action.
Step 1: Remove the Broken Tip
Start by applying gentle heat to the damaged tip using a lighter or heat source to soften the glue. Carefully pull off the broken tip without damaging the rod blank underneath.
Step 2: Clean and Prep the Rod
Lightly sand the exposed rod end using fine-grit sandpaper to remove old glue and rough edges. Ensure the surface is smooth, straight, and properly aligned for a secure fit.
Step 3: Attach New Tip
Apply a small amount of adhesive or tip glue to the rod end. Slide the replacement tip onto the rod, making sure it aligns perfectly with the guides for proper performance.
Step 4: Secure with Epoxy
For added strength, apply two-part epoxy around the base of the new tip. Let it cure completely before using the rod to ensure a durable and long-lasting repair.
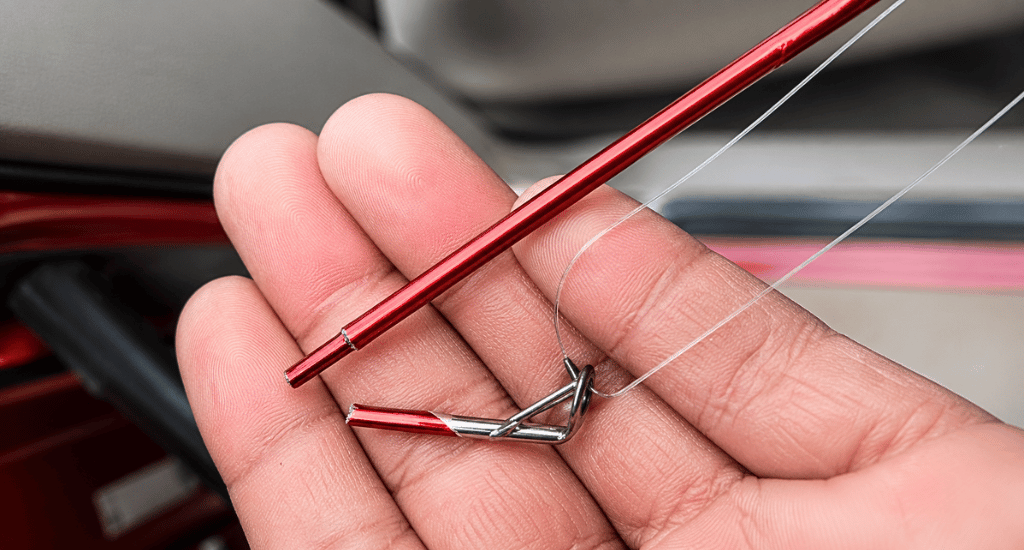
How to Fix a Fishing Rod That Broke in Half
A rod broken in half may seem beyond repair, but it can often be restored with proper reinforcement techniques. Using internal support and strong adhesives helps rebuild strength while maintaining reasonable performance for continued use.
Step 1: Prepare the Broken Ends
Start by preparing both broken sections to ensure a clean and secure bond. Proper preparation improves alignment and allows adhesives to hold effectively without weak points in the repaired area.
- Gently sand both ends using fine-grit sandpaper for smooth surfaces.
- Remove any cracks, splinters, or loose fibers around the break.
- Ensure both sections align perfectly before proceeding.
- Clean off dust or debris for better adhesive bonding.
Step 2: Insert Internal Support (Spigot Ferrule Method)
This method reinforces the rod internally, making the repair stronger and more durable. It involves inserting a solid piece inside both ends to stabilize the connection.
- Use a piece from another rod or a solid rod section as support.
- Insert it halfway into one side, then fit the other side over it.
- Ensure a snug, tight fit for maximum strength.
- Acts as an internal reinforcement to restore structural integrity.
Step 3: Apply Adhesive
Once aligned and reinforced, bonding the sections securely is critical. A strong adhesive ensures the repair holds under pressure during casting and fish fights.
- Coat both inner and outer areas with rod resin or epoxy.
- Join the pieces together carefully while maintaining alignment.
- Wipe off excess adhesive for a clean finish.
- Allow sufficient curing time before using the rod.
Binding Method (Strong DIY Repair Technique)
The binding method is a reliable DIY technique used to reinforce a broken fishing rod. By tightly wrapping the damaged area and sealing it with epoxy, you can restore strength and extend usability effectively.
Materials Needed
Using the right materials ensures a secure and long-lasting repair. These items help bind the rod tightly while providing durability under stress during regular fishing use.
- Number 8 wire: Provides strong, rigid support for tightly securing the break.
- 30 lb braid line: Flexible alternative for tight wrapping and better finish.
- Rod resin or epoxy: Bonds and seals the wrap, adding durability and strength.
Step-by-Step Binding Process
This process focuses on reinforcing the broken section externally. Proper wrapping and sealing are key to maintaining strength and preventing the break from worsening under pressure.
- Align rod pieces carefully to ensure straight and proper positioning.
- Wrap tightly using braid line or wire around the broken section.
- Apply resin or epoxy evenly over the entire wrapped area.
- Seal with nail polish for a quick protective layer before full curing.
How to Fix a Broken Fishing Rod Guide or Eye
A broken guide or eye can damage your fishing line and reduce casting performance. Thankfully, it’s a simple repair that restores smooth line flow and improves casting accuracy with proper installation and sealing techniques.
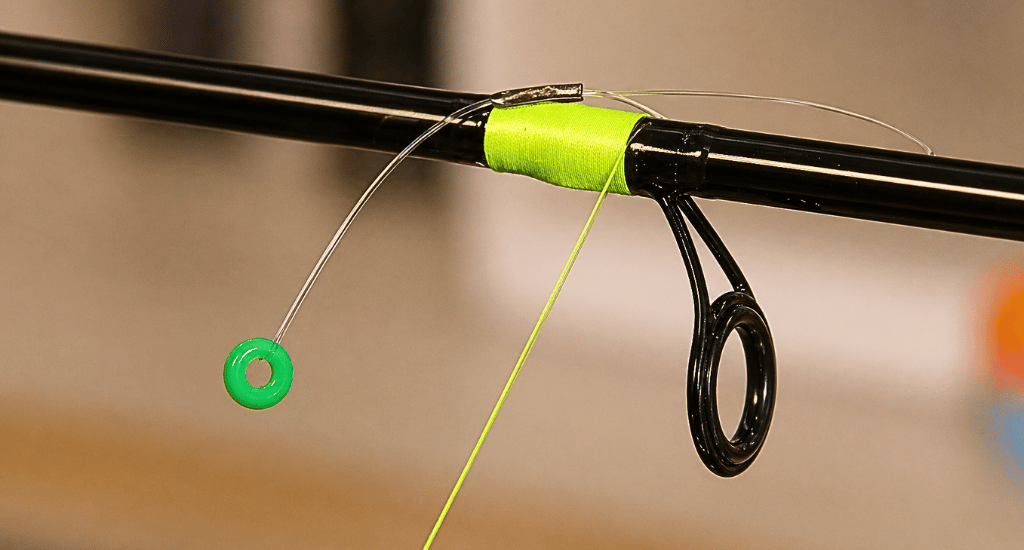
Removing the Damaged Guide
Start by carefully cutting the thread wraps holding the guide in place. Remove all old thread and adhesive, then gently detach the damaged guide without harming the rod blank surface.
Installing a New Guide
Align the new guide with the existing guides to maintain proper line flow. Wrap the thread tightly and evenly around the base, ensuring the guide stays secure and correctly positioned during use.
Sealing the Guide
Apply a smooth epoxy coating over the wrapped thread to secure the guide permanently. Let it cure completely while keeping the rod steady to ensure a durable and long-lasting repair.
How to Fix a Broken Fiberglass Fishing Rod
Fiberglass rods are known for their durability and flexibility, making them easier to repair than graphite rods. With the right approach, you can restore strength and function while keeping performance suitable for everyday fishing use.
Key Differences in Repair
Fiberglass rods are more flexible than graphite, which makes them less prone to snapping completely. While repairs may slightly reduce stiffness, they remain a solid option and are often considered the best rod side for beginners.
Best Repair Method
The most effective repair method involves inserting internal support combined with strong epoxy bonding. Reinforced wrapping around the break adds durability, helping restore structure while maintaining enough flexibility for continued fishing performance.
Conclusion
Most fishing rods can be repaired with simple tools and the right techniques, saving you from unnecessary replacement costs. Whether it’s a quick tip replacement, a strong binding technique, or a ferrule or sleeve repair, effective solutions are available for different types of damage.
By learning how to fix a broken fishing rod, you can restore its functionality and extend its lifespan. However, if the damage is severe or affects performance significantly, replacing the rod may still be the better long-term option.